Sunday, 11 December 2016
Saturday, 3 December 2016
Monday, 21 November 2016
Ceiling Cables (for Joe)
(Copy of the Facebook conversation)
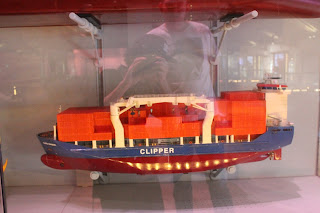
In a nutshell, they will be attached to the ceiling with one of them broken, which is where the flashing light is going to come from. so this is what we need
1x Broken Cable
1x Non Broken Cable
hats the rough size of them.. should be able to fit 3 nicely on each side of the light with a bit of space between them. And would need to be the exact length of the ceiling panel.... you will only need to make one of those and unwrap it, should be mega quick. If u just make one, I'll duplicate it in the scene.
then we will need one of these. So same length and everything, just hanging down with like three little wires coming out.
and thats roughly how they are going to be used. Let me know if you have any questions or if it doesnt make sense mate
Screen shots
These screen shots are of walls 1 and 3 ( Main _ Wall ) ( Window _ Wall)
The window wall was taken a bit to long to finish . i wanted to window wall to look slightly different from the other walls as the outside would shine through more
Sunday, 20 November 2016
Wednesday, 16 November 2016
Lighting
In preparation for the lighting of the scene, I purchased a backdated special issue of 3D artist that focused on light.
following the research I made the following decisions:
I would be using Motivated Lighting which essentially allows you to use the lighting in a way that makes sense with the scene, but with added creative subtleties for creative purposes (for example lights coming from a bulb in a scene makes sense, but softer lights can be positioned to around the scene to get a desired effect)
I would use a Hierarchy of Contrasts to guide the viewers eye around the scene. In the first image that shows the entire scene, I wanted the focus to be on the door in the distance, then for the eye to wonder over to the planet outside the window, before finally looking at the details on the walls, then floor and ceiling.
Light Direction, Quality and Colour:
Direction:
For the most part side lighting would be used for the walls to show the textures better, but a front light would be used on the main door as part of making it the main focus point. Spot lights would be coming from the ceiling, and soft, point lights on the floor to mimic bounce light and to highlight the details on the walls some more.
Quality:
To create a hard shadow around the door I would use a spot light with no outer cone. In general I will be aiming for harder shadows to create a more dramatic affect.
Light Colour:
I will be experimenting with cold colours to create the lonely, isolated ambiance we are going for. Will have to make sure that it doesn't clash with the textures.
some basic planning before I started:
working on the main focus point:
added point lights as bounce light:
Nearly there now. Need to experiment with light colour:
Texture Tests
We've started to import and test our textures. Things are starting to look good but we noticed that we hadn't made it clear enough how big the grids would be on the floor and so they have come out far to big. This has meant more work for Nathan and we need to figure out how we could have prevented this. Perhaps by using other pieces of the ship as references whilst modelling, or maybe even getting the scales of the grid down?
Sunday, 13 November 2016
Saturday, 12 November 2016
Steam Particle System
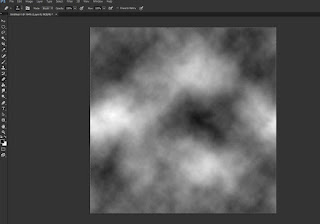
The Steam Particle system has now been created and added to the scene although it will be tweaked and refined once all lighting and textures are in place. This is the process:
512x512 image was created. Filter-Render-Clouds using black foreground and white background colours.
I used a soft eraser to get the shape, and used Levels and Select by Colour to remove most of the black.
I then duplicated what was left and layered a some copies of the same image and repositioned them to get this image.
I used this as the sprite for the particle system in Unreal after watching a tutorial on youtube
Friday, 11 November 2016
Monday, 7 November 2016
Wednesday, 2 November 2016
Monday, 31 October 2016
Friday, 28 October 2016
Monday, 24 October 2016
Subscribe to:
Comments (Atom)


